 Woman Scarecrow at Grampari in a beautiful sari I joined Grampari as Sustainability Program Co-ordinator in September, 2012. Grampari is a non-profit organization that works for rural people and ecology. As a part of their watershed program, they started an organic vegetable garden on their campus, along with two lemon tree orchards. I hope to be at Grampari for 4 more months. Currently I look after the organic vegetable garden as well as the grounds and in the last 5 months several changes have taken place at Grampari that I wanted to share with all of you. This is also a good way to understand the many practices of organic farming that I have written about in my blog. A good farm comes from a balanced eco-system and by working with local people. Management of the Grounds: I work with two other people on the management of the grounds, garden, and orchards. Both Sujata and Shashikant are from nearby villages with a passion for farming. Post-monsoon days have been 8 hours of weeding! This time we also tried to plant long-term, low nutrient and water requiring, flowering, native medicinal plants and shrubs. Over 150 seedlings were planted of plants such as Adulsa, Mehendi, Tulsi, Citronella, Ticoma, Peppermint, Chitrak, Tagar, Vetiver etc. Landscaping the grounds with these plants will ensure lower weeding after the following monsoon. Planting natives and medicinal plants is extremely important for creating a balanced eco-system allowing for arrival of beneficial insects and birds. 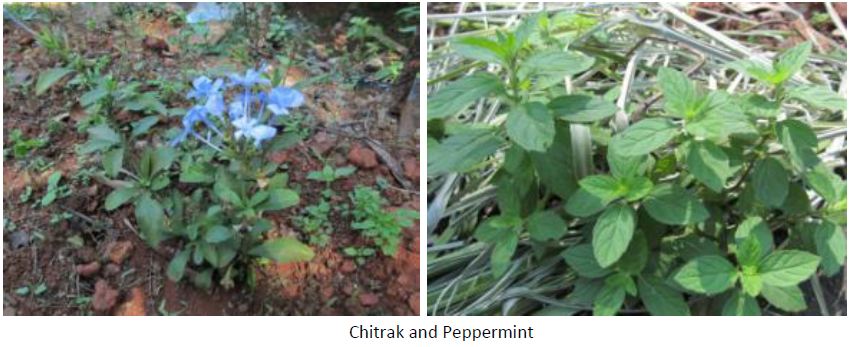 The lemon/lime orchard below the organic garden was cleared of its tall grass by 4 women employed from Godavali. It was a huge change that gave us access to endless limes and lemons. The most productive part of Grampari is definitely the citrus orchard. Dead lemon trees were replaced by new ones and 4 Amla trees have also been planted in empty spaces. The next steps involve landscaping the orchard in order to have a ground cover going before the monsoon in order to prevent the return of the tall elephant grass. 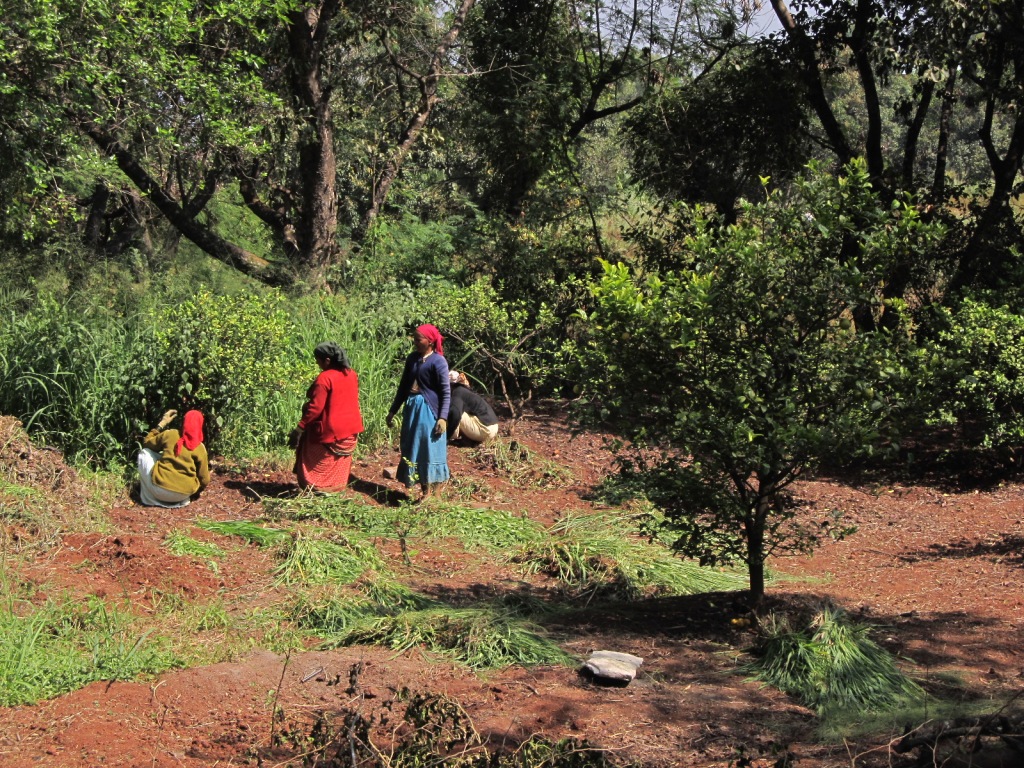 Lemon Orchard being cleared of weeds Organic Vegetable Garden: Apart from organic lemons we had a wonderful harvest of 20 pumpkins that had grown over the monsoon. After more than a month of weeding and re-creating our raised beds, we began our planting in September and October. We also began cultivating a small section on the upper part of the garden which is an experimental section for organic wheat. Including the upper and lower areas we have planted about 25 different vegetables. On a regular basis we are harvesting lettuce, coriander, methi, spinach, bananas, mint, lemon grass and lemons. We have now started also harvesting radish, capsicum, cauliflower, cabbage and chillies. 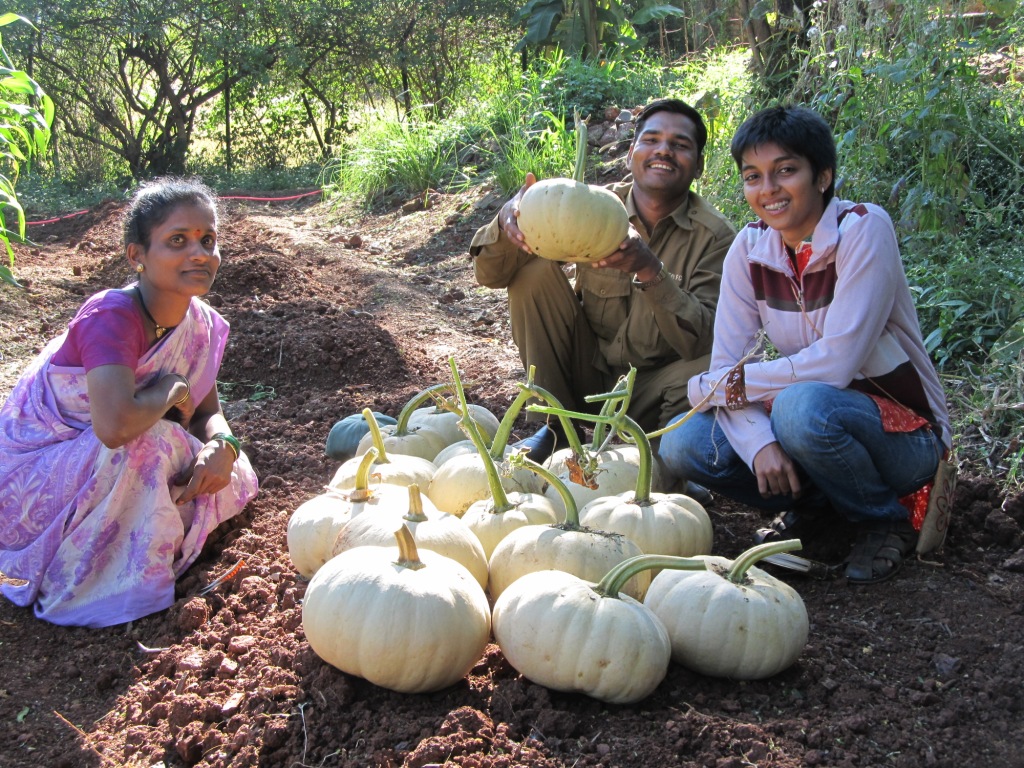 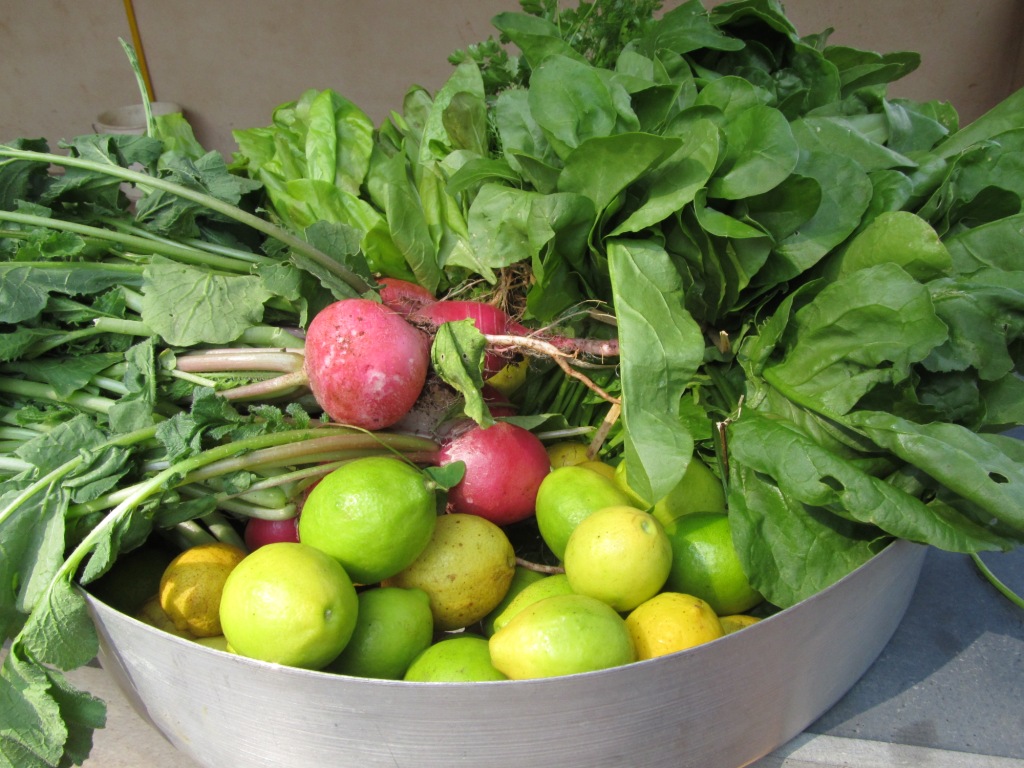 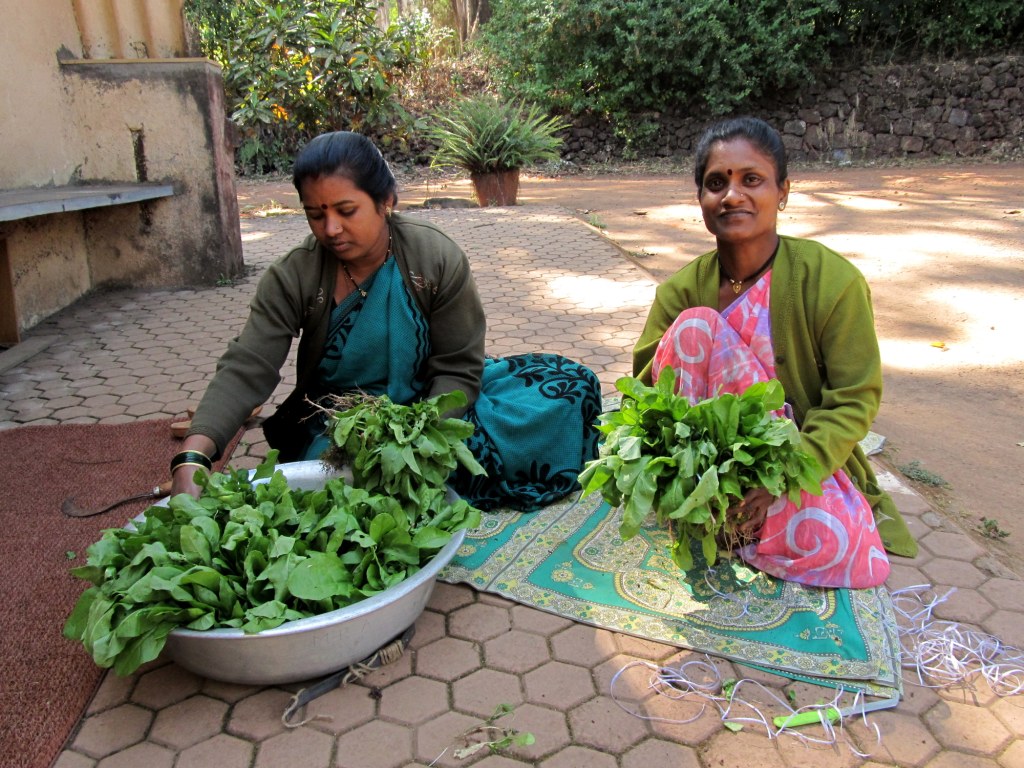   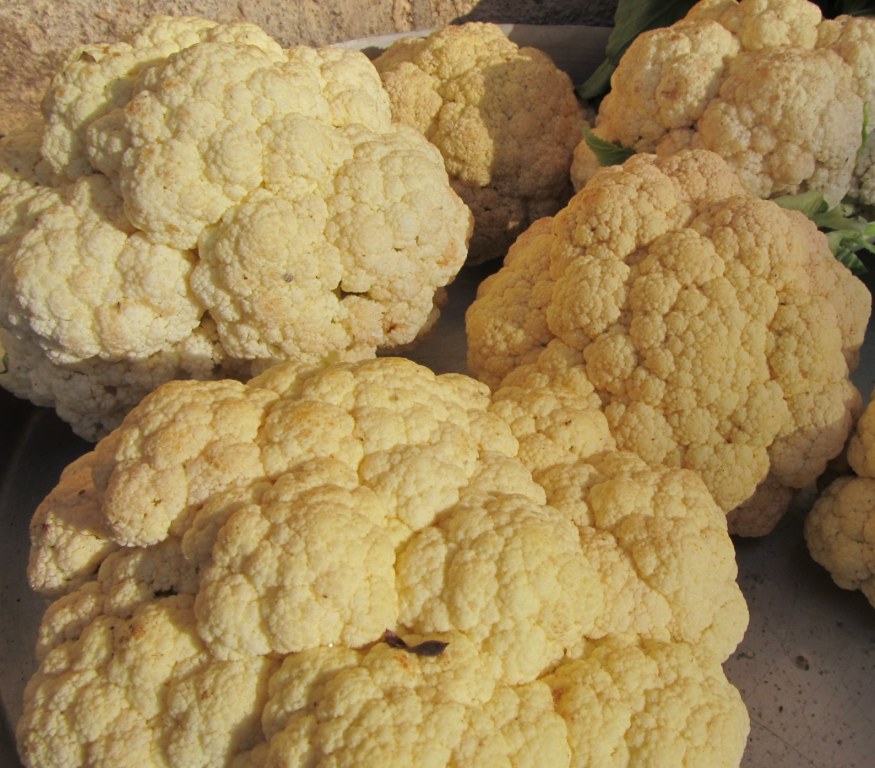 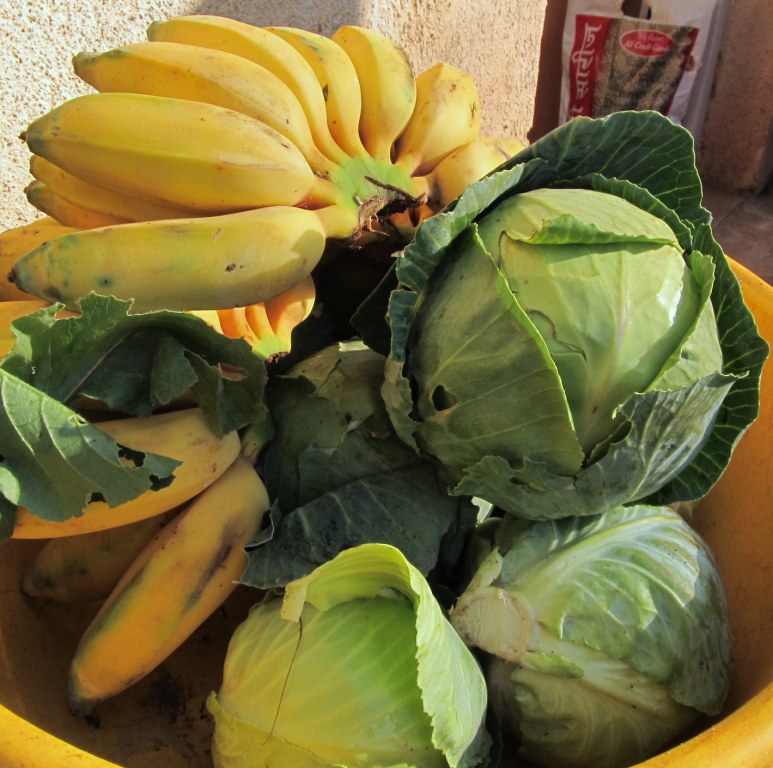 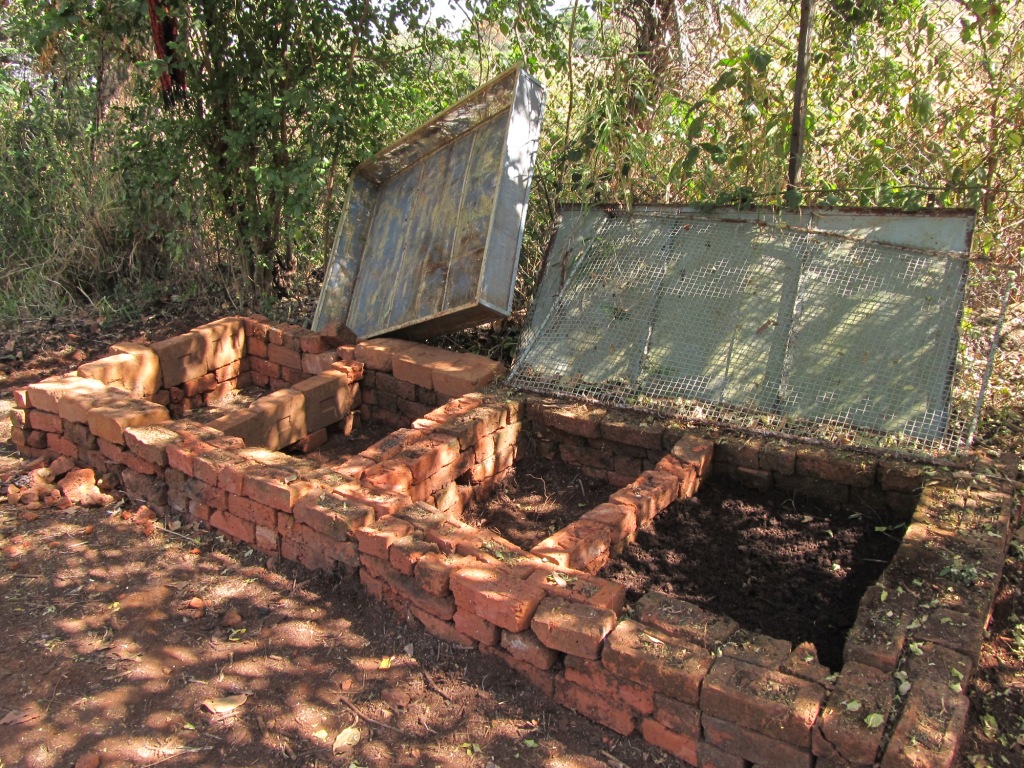 Some of the techniques being applied are composting, vermicomposting, mulching, intercropping, and water conservation through drip irrigation. For mulching we have managed to find rice husk after a long search. Our three compost pits are almost full and undergoing decomposition. We have re-done our vermicompost system to ensure it functions properly and to accommodate more food waste that will be produced from month-long residential training programs. Drip Irrigation System: Our newest project which has been a success is setting up of the drip irrigation system. After doing surveys, and calculations we projected a cost of about Rs.6500 for the drip irrigation material required in the organic vegetable garden as well as the border plantation. We bought about 480 metres of drip pipe and other parts. At one of our shramdaans (voluntary work) for the students of Symbiosis (SCIT) we put forward this quotation in the hopes of finding a source for this money. To our amazement the students amongst themselves contributed a bit of money each and provided us with Rs.9200! It was more that what we had asked for and we are tremendously grateful to them. The drip irrigation is now set up and the total cost was approximately Rs.7200. Drip irrigation is one of the most effective ways of watering. It has minimal exposure to the atmosphere resulting in least evaporation. The water seeps in slowly and spreads laterally just the way plants like it. 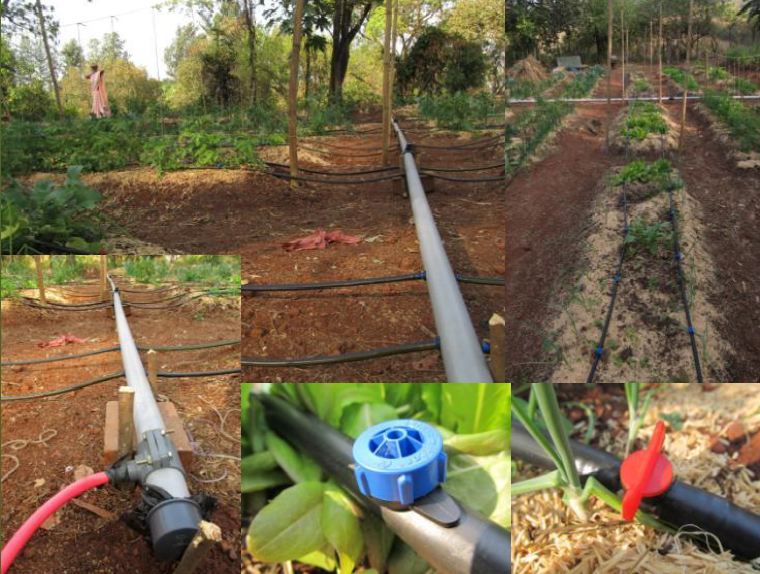 Watershed Demonstrations: In the last year several staggered couture trenches have been made to ensure ground water recharge. The last few months have seen the installation of another roof-top rainwater harvesting system done by Jared, Renie, Ankush, and Ankur. It includes a first-flush device to perform basic filtration of the rain water which is then directed into a water tank. The water tank which used to be an old and dysfunctional biogas plant can store up to 28 thousand litres of water. We hope to use the water collected next monsoon for the watering of the garden in the dry months. 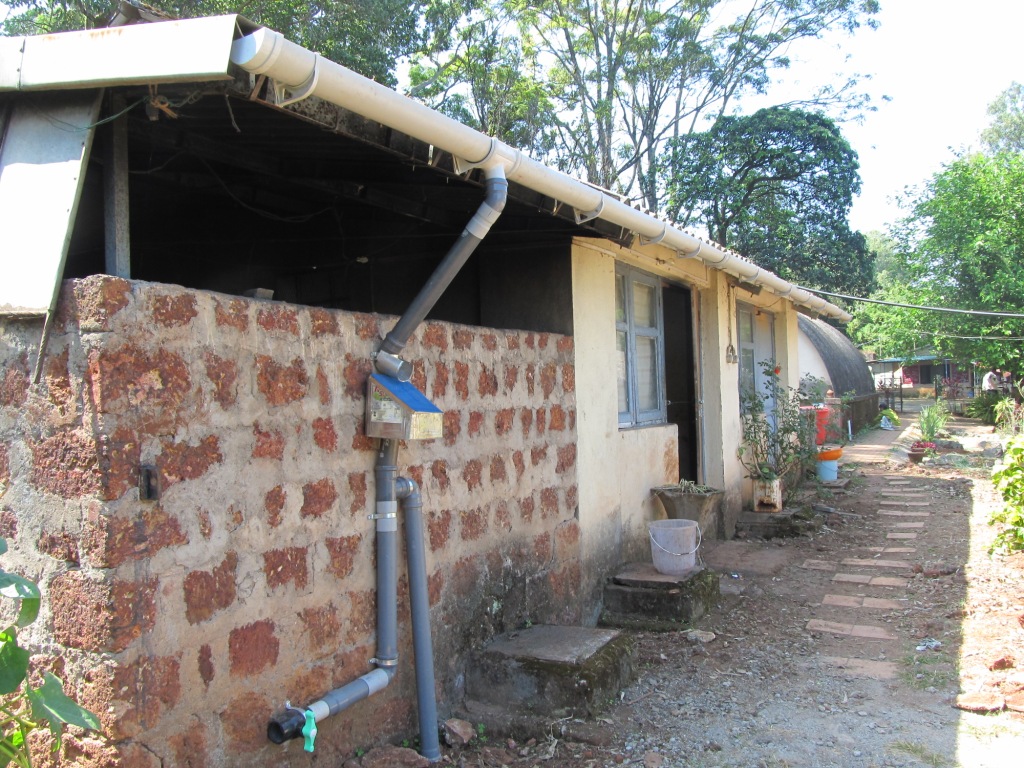 Ongoing and Future Projects:
Our ongoing projects include watering and maintenance of the grounds. Landscaping and planning of the lemon orchard is a big part of our work. We now hope to also begin reaching out to farmers from nearby villages through short organic farming workshops. Meanwhile we are also working on a farm manual both in English and Marathi to be prepared for future farm managers. Best wishes to everyone for 2013 and do come to Grampari for some fresh vegetables and black tea with lemon grass!
2 Comments
 A Great Example of Intercropping where you can see Turmeric, Okra, Gourd, Squash, Tomato, Herbs, Marigold, and a Tree growing together! In life we have been taught since our childhood to be neat and clean. That means everything should be arranged and orderly. While it may be of value to teach to our children to be neat and orderly, it does not work so well in the context of organic farming. An organic garden can be beautiful and aesthetically extremely pleasing. However it will never look orderly or disciplined like chemical and industrial farms look. Rows and rows, acres and acres of neat rows of one single type of plant, crop, and vegetable. It may seem pleasing to our mind and senses which are conditioned by artificial order, however it is not the rule of nature. So what is really the problem with mono-cropping (single species plantation)? This question is more easily answered by understanding how intercropping is beneficial. But a short and logical answer is that mono-cropping creates a weak system where one pest, one drought, one unfavourable climatic condition, can wipe out an entire crop resulting in complete loss for the farmer. Once more the forest has a lot to teach us on this topic. The forest is one of the highest biomass producing eco-systems and more precisely tropical and evergreen forests have the highest production amongst types of forests. What we typically see in such forests is that it has the highest biodiversity. Very rarely will you find only one species growing in even a tiny area. Biodiversity is the strength of ecosystems. Won't we have better luck if we learn to imitate the forest system of production? Let us look at some benefits of intercropping in organic farming and gardening. Pest Control If your garden bed has more than three types of plants growing on it, and no same plants are touching each other, it reduces the impact of pests dramatically. There is a very simple explanation for this. Pests usually move from one plant to the other and usually pests like one or two kinds of plants. When there is one straight line of the pests' favourite vegetable it will keep going from one to the other and keep multiplying. If the pest eats one plant and then next it encounters a plant that it doesn't like, then it will think there are no more of its favourite plants and so it may disappear or simply remain in small numbers. Nutrient Control and Optimization Every plant has different nutrient requirements. If you have a monocropping of only vegetables such as cauliflower or sweet corn which are high nutrient consuming plants, then your soil will become depleted very quickly and will require you to keep adding hight amounts of nutrients externally. This is both harmful to nature as well as inefficient. Intercropping high nutrient consuming vegetables with low nutrient extracting and nitrogen fixing plants will give you a diverse and higher yield. This chart below will give you some idea of what are high and low nutrient consuming vegetables. 1. Fruiting Vegetables (e.g Tomato, Brinjal, Cauliflower, Cabbage etc.) High 2. Leafy Vegetables (e.g. Spinach, Latmat, Methi, Corriander etc.) Medium 3. Roots (e.g Carrot, Raddish, Sweet Potato etc.) Low 4. Legumes (e.g Tur dal, Chawli, French Beans, Soya bean etc.) Nitrogen Fixing Nutrient management automatically leads to less requirements of water, fertilizer, and mulching since plants can form their own mini-ecosystem with less needed from the outside. So how can you do it? As I always say don't be afraid to try something out. Trial and error is your best friend because only your context will tell you what can be best intercropped and how. There are several established examples of intercropping and companion planting. Tomato and Marigold Companion Planting: This is a very common example. Companion planting is where the two plants are meant to be with each other because of how beneficial they are to each other and to us. Tomato pests are mostly nematodes which means they come from the soil. Marigold roots have a property that kills these soil nematodes. So they do very well together and at the end of the day you have beautiful tomatoes and marigold flowers to harvest. More information on companion planting and intercropping can be found here. 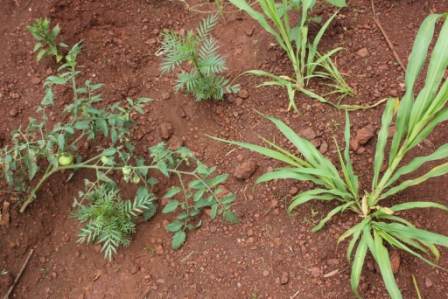 Tomato Companion Planting with Marigold 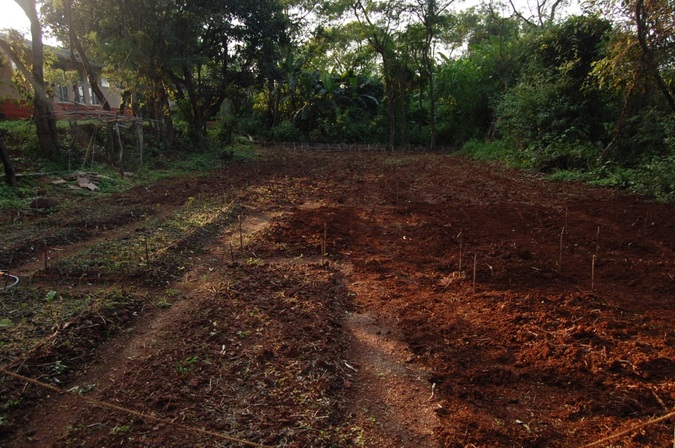 Organic farming gives most importance to the soil. Understanding and nurturing the foundation of plants, and trees is extremely important. Learning how to prepare good soil, how to maintain it, and how to replenish it, is the most valuable skill for any gardener. Lets see how we can understand the first step of planting...preparing the soil. If you would ask me what I love most in the process of gardening, it is definitely preparing the soil. Who wouldn't want to play in the mud!? In an ideal situation where the balance of nutrients in and out is maintained, and the soil remains wonderfully soft, moist, and nutritious like in a rainforest, you would not have to touch or disturb the soil. However, most people are not lucky to have such amazing soil to start with. So effort must be made towards reaching a point where preparing the soil becomes a minimal activity.
So when I say preparing the soil, what is the first thing that comes to your mind? Ploughing? Indeed that is what most people think it is. If you understand how alive the soil and earth is, then you will only be able to look upon the ploughing as raping of earth. Ploughing with machines is worse than with bullocks. But almost all ploughing that is now manual, tills the soil too deeply, thus disturbing the delicate soil structure. Sowing seeds requires only 2-3 inches of lose soil. Technology has unfortunately misunderstood the working of nature. So how can you prepare soil in an organic manner? Loosening the Soil: If you have a garden with quite a bit of space, and the soil looks like it has been compacted, then it might require loosening. The same applies to soil in pots. The process of loosening also involves the removal of stones and breaking down of clumps of earth. This loosening of soil is done for a couple of different reasons. One is to help the seeds or seedlings planted get rooted more quickly instead of struggling with hard soil. The second reason is for easier removal of weeds. It is important to remember that loosening all the soil of your garden or pots should only be done once before planting new seeds or seedlings. Weeding is best done gently by hand once planting has already been done. Making Beds: Once you have loosened the soil, you can make beds by moving the soil into different shapes. Smaller beds are always better than bigger beds because the less you walk on the bed, the better it is for the plant. 1 meter wide beds are a good size. Beds usually are higher than the ground around them and so they are called 'raised' beds. Raising the height of your beds helps in production of bigger vegetables. However it is not necessary for all kinds of vegetables. Roots and tubers may prefer raised beds while ordinary hardy plants such as chillies or leafy vegetables may not require that. Be creative about making beds. Don't believe anybody who says that beds must be rectangular. Have you tried semicircles? It works great! Adding Nutrition: The assumption that I unfortunately have to make these days is that most soil is degraded and requires the addition of nutrients from outside. Once you have decided the shapes and spots of your beds, you can add compost, vermicompost (worm castings), or animal manure (cow, chicken, sheep, goat, horse etc.). Some people prefer to mix the soil and the compost while others prefer to just lay down the compost as a top layer of the soil so that the nutrients can slowly seep into the soil with the water. Any method is fine. Compost can be added in good quantity for example 1/4th of the content of your garden bed or pot can be compost. Vermicompost and animal manure have stronger nutrition and thus must be used in lesser amounts and mostly closer to the plant. Levelling the Soil: Once you have added the compost and/or other nutrition, you need to level the surface of the soil. The reason for this being important is to make sure that every plant on the bed gets adequate water. If the soil around your plant is slopping away from it, then the water will run away from the plant and probably over-water the plant towards the bottom of the slope. The final product of your efforts should be soil that is mostly devoid of rocks, stones, and clumps of earth. If needed just sit down and feel the soil with your hands to know if there are rocks or clumps. Think of it as meditation or just pure fun as you break these clumps of soil with your hands. Once you have accomplished these steps, you are ready to plant! If you leave this wonderfully prepared soil barren for too long, it will result in a loss of all the nutrients that you had put in with all your hard work. So remember to prepare your soil only when you are ready to plant. Tool Tips! Here are some great tools that you can use to prepare your soil. Click on the names to view their photographs. Hand Shovel - For loosening the soil, mixing, weeding, scooping (good for pots) Hand Rake - For Levelling the Soil, mixing (good for pots) Shovel - For loosening the soil, mixing, weeding, scooping (good for gardens) Rake - For Levelling the Soil, mixing, raking leaves and weeds (good for gardens) 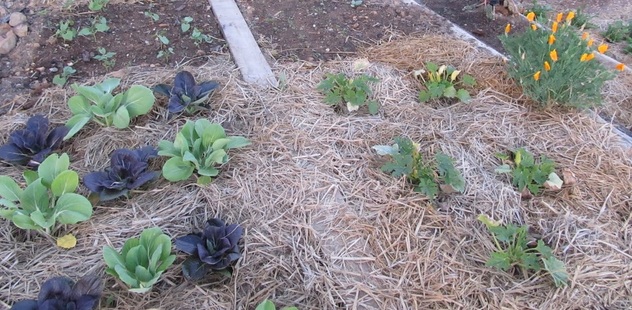 Straw used as Mulch on a Garden Bed Whenever I take a walk in the forest, what I love most is the sound of the crackling leaves under my feet, the softness of the soil, and the strong and tall forest trees. We may not give a second thought to the leaves under our feet in the jungle, but everything in nature has a role to play. These leaves have not fallen to the earth for no reason. They are nature's mulch! So what is Mulching and Mulch? Mulching is to me, one of the most important techniques followed in organic farming. It serves multiple purposes and you will feel immensely thankful for the outcomes of something so simple. Mulching is an activity that involves using certain kinds of material to cover the soil around the plants and seedlings that you have planted. Therefore, mulch is any type of material that is spread or laid over the surface of the soil as a covering. Mulch Material: In organic farming you can use any thing that is biodegradable as your mulch such as; straw, hay, dry leaves, shredded paper, dried grass, wood chips, stalks or husks of rice, wheat, etc. So what is the purpose of mulching? 1. Mulching on top of your soil around your plants prevents the moisture from escaping from soil due to heat. Mulching when done properly can reduce the required watering by 40-50 percent! 2. A good layer of mulch also helps in keeping the weeds down by making it difficult for them to grow. This reduces the competition for nutrition for your veggies. 3. It is also a great way to do composting in-place! With time the organic mulch begins to decompose and provide nutrition back into the soil. Why does mulching work? Forests are our teachers once again to understand this. In a forest there is a cycle and flow of give and take. The cycle of nutrients is essential for an healthy forest. As plants and trees grow, they take a lot of nutrition out of the soil to do so. The leaves, branches, and even dead trees that fall down to the forest floor, replenish the nutrition of the soil through their decomposition. As much nutrition goes out, just as much goes back in. The forest floor remains moist due to this and has the best soil you can find. However agriculture only seems to keep taking more and more out of the land. So how can it be restored unless we do it ourselves? The secret about the foundation of mulching is that plants love sunlight, but the soil does not. Everything that lives in the soil such as the roots of plants, earthworms, and micro-organisms, thrive in the dark and moist. So mulching works! How and when do you mulch? It is extremely simple. All you have to do is lay out your mulch material in layers out on the soil in your beds or even in your pots. If you put too little mulch, it will not be effective. If you put too much, you may suffocate the soil. If you are using straw or dry leaves, a good layer would be anywhere between 4-6 inches. The soil needs to breathe and so the material you use needs to be breathable like dry leaves and straw. If you use newspaper, you need to shred it, otherwise the soil will not be able to breathe through a plain sheet and this can lead to disease and pest problems. A good time to mulch is when your plants are about 6 inches tall. You can also mulch if your garden, land, or soil is barren for certain months in the year. Providing moisture to the mulch will enable the decomposition. Instead of the moisture and nutrition disappearing from the soil due to heat, the mulch will help to keep it in and replenish the soil at the same time. So when you decide to plant again, you will have beautiful soil. Trial and error is your best friend. But guess what? You have nothing to lose. 
A Mulched Garden Bed
Creating Living Soil Chemical-based farming operates on the assumption of dead soil; which means there are no nutrients available in the soil and so they need to be added physically. And after the use of chemical pesticides and fertilizers, the life in the soil diminishes greatly, thus reducing the productivity of the land. So you end up using even more chemicals the next time which leads to a vicious cycle. The focus of chemical farming is to give all the input to the plant, which is a short-term process. Whereas in organic farming the focus is on creating good and healthy soil so that whatever is planted grows well. It requires patience and dedication to renewing and regenerating the soil naturally which ultimately gives you long term productivity and health benefits. When you look at the soil, it may seem like lifeless clay and rocks. But in fact it is very much alive. Millions of small organisms live in healthy soil which is rich in organic matter. Some of them are big enough to see, such as earthworms and small insects. But, most of them are so small that you can only see them if you use a microscope. These microscopic organisms include nematodes (tiny worms), bacteria, fungi and even some insects which are invisible to the naked eye. These living organisms make soil alive and give it a good structure and texture. A living soil ecosystem nurtures and nourishes plants by providing a healthy medium to take roots and through a steady supply of nutrients. Most of the organic farming techniques focus on building living soil. So lets begin by understanding four basic techniques that everyone can apply, whether it is a garden, farm, or pots in your balcony. 1. Compost 2. Mulch 3. Manure 4. Cropping Methods Compost 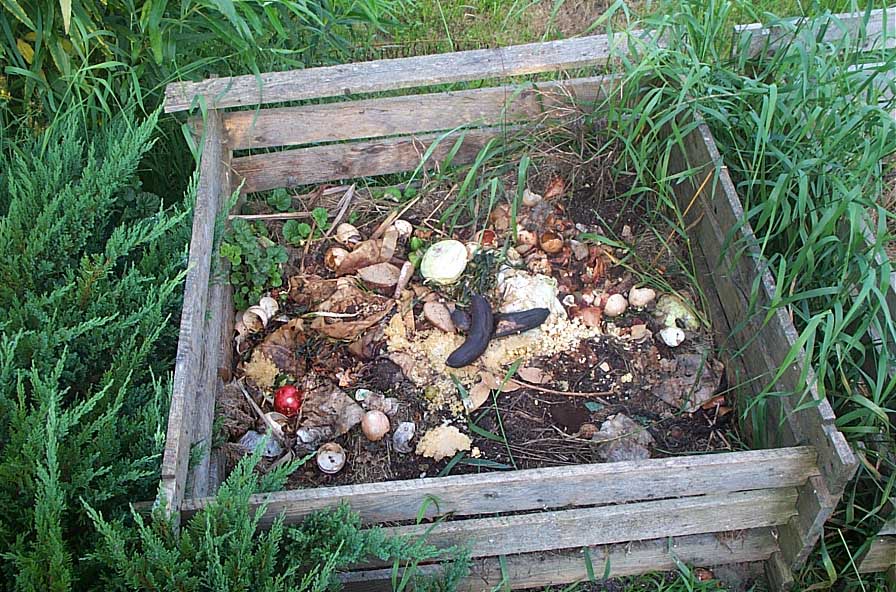
Initial Compost Phase
Compost-making is simply imitating nature's process of natural decomposition as we can witness in the forests. The dark-hummus like substance found on the forest floor is compost. It adds essential nutrition back into the soil which the plants and trees then take in to grow. Just like everything in nature, this is also a cycle of give and take. The amount of nutrition that is taken by a tree or plant to grow is returned to the soil when the dead tree falls to the forest floor and begins decomposing. Therefore, while growing our vegetables in our gardens, we need to put back the nutrition that we are taking out. Compost is a natural fertilizer, and good, mature compost, is one of the best fertilizers that can be found anywhere in the world. To make good compost it is essential that it is an aerobic process that creates compost rather than methane gas as a by-product. For this you need all your bio-degradable kitchen waste (cooked/uncooked food scraps), some dry leaves, grass, or straw (brown matter), soil, and water. If these ingredients are managed in the right order then the result will be great compost that you can add to your soil which will boost the growth of your plants. If growing in pots, it is even more essential to ensure that the soil remains rich in nutrients, since natural cycles of nutrients, soil, and water become restricted in pots. There are several ways of making compost depending on the size of your garden or farm as well as on the urgency and requirements of produce. However the following are some simple steps that are essential for anybody who is making compost. Step 1: Location: Choose your space for making compost. The best space for making compost is on direct soil. If you do not have a garden, create a small space where you can put some soil on the floor. Don't worry about the smell and flies. If done right, you won't have either and you can always cover your compost. Step2: Maintaining Proportions: An important thing to remember about compost-making is maintaining the balance between nitrogen (wet, green, fresh waste) and carbon (dry brown matter). The proportion between the two should be roughly 30% Nitrogen to 70% Carbon. Step 3: Creating Airways: It is essential that air should pass freely through the compost pile. For this ensure that if your cover the compost, that there are holes in the surrounding structure or bin. This is essential for aerobic decomposition. Step 4: Layering: There are many ways of layering. However a simple way to remember how to layer is to remember to alternate between wet and dry layers. So if you have just put in a fresh batch of waste from your kitchen into the compost pile, put a layer of dry grass or leaves on top of that and you can also add some soil as it may quicken the composting process. The dry layer will also keep animals, flies, and bad odour away. Step 5: Maintaining Moisture: The process of decomposition requires moisture. If the compost pile gets too wet it will lead to anaerobic decomposition (rotting) and if the pile is too dry, then it will not decompose quickly. So it is essential to keep the pile moist. Check the pile before adding water to see if it needs any. Step 6: Regular Turning: Once the container in which you are piling your wet waste and dry leaves into is full, then you need to STOP adding new waste into that. You can either create a new pile or just find a another place for your waste. Once the container is full, you need to turn (mix) the compost once every 2 weeks to quicken the decomposition process and to ensure that there is only aerobic decomposition taking place. 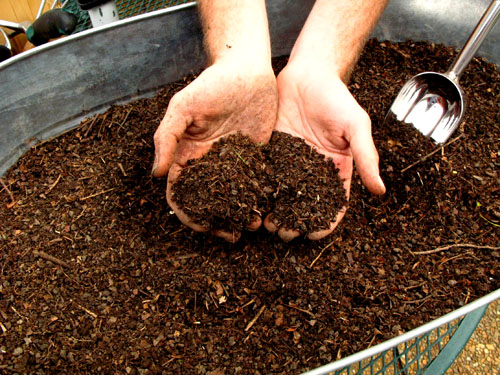
Final Product after Decomposition
If you are in a tropical country like India where decomposition is very rapid, you should have a wonderful pile of compost ready in 30-45 days. Once ready you can store it in a dry place and use it liberally on your soil before planting, and after planting.
Next article on how to make compost in a plastic garbage bin. Compost Away! More Information can be found here: A great article on composting for further reading: The Basics of Composting |
Principles and Practices of Organic and Natural Farming Archives
November 2018
Categories
All
|
 RSS Feed
